Quickstart
Start automating data operations in under 5 minutes
Datangle onboarding page
Getting started with Datangle
To get started with Datangle, go to the sign up page. Sign up with your email address, then follow the steps to start automating data operations.
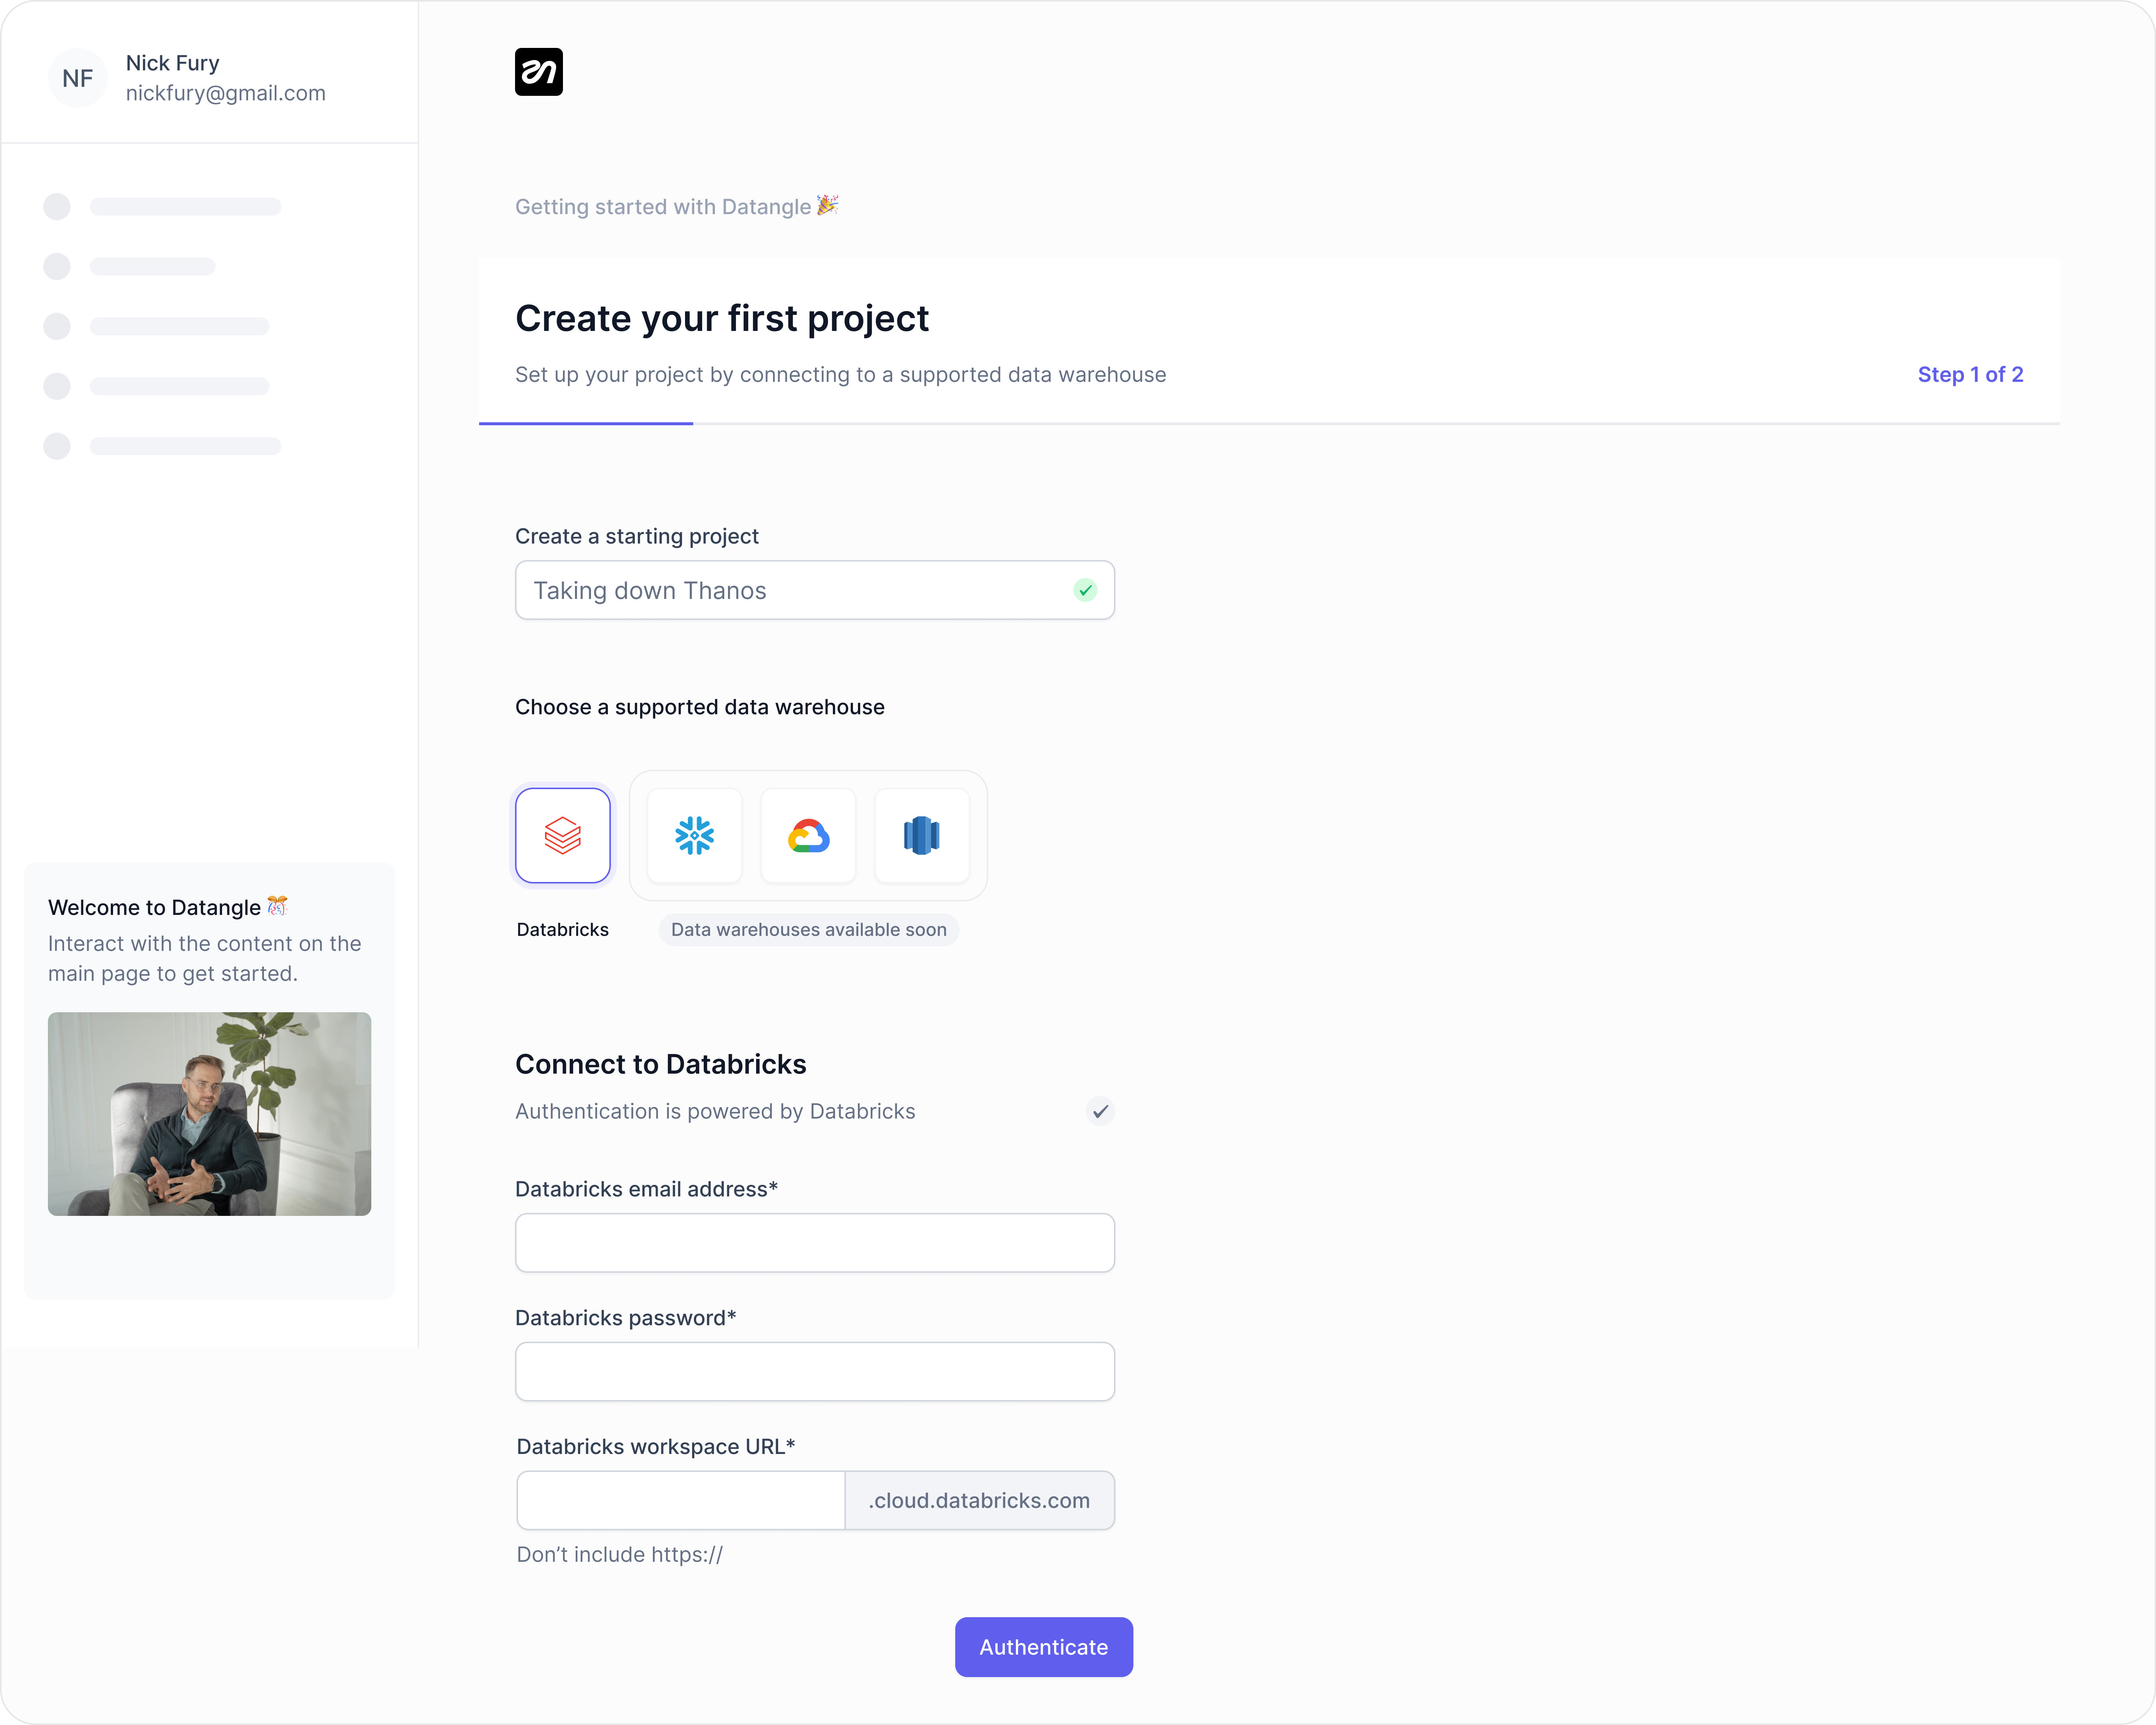
1. Create your first project
As part of the onboarding process, you are presented with a textbox to provide a project name. The project name must be unique with atleast three characters.
2. Connect your data warehouse
To connect to your data warehouse, you need to select your preferred provider and provide the information related to it. Datangle currently supports Databricks and Snowflake.
Field | Description |
---|---|
Username | This is the email address or username associated with your Databricks account. |
Password | This password is associated with the username specified above and used in logging into your Databricks account. |
Workspace URL | Your Databricks workspace URL. Read the Databricks documentation to learn how to determine your instance name. |
Field | Description |
---|---|
Account | Enter your Snowflake account name and region (part of the URL you use to log in to Snowflake). Uses the format [accountName].[region_id]. |
Username | This is the email address or username associated with your Snowflake account. |
Password | This password is associated with the username specified above and used in logging into your databricks account. We currently support full Saas deployment model. |
coming soon!
coming soon!
Once the authentication process to your preferred data warehouse is completed, you are prompted to select warehouse defaults to act as your first environment and linked to the project. Select the defaults based on your preferred provider as listed below:
Field | Description |
---|---|
Cluster | Choose the Databricks cluster that Datangle will connect to. |
Catalog | Choose a Databricks Unity Catalog to connect to. |
Schema | Choose a Delta Lake schema to connect to. |
Field | Description |
---|---|
Cluster | Choose the Databricks cluster that Datangle will connect to. |
Catalog | Choose a Databricks Unity Catalog to connect to. |
Schema | Choose a Delta Lake schema to connect to. |
Field | Description |
---|---|
Role | The default Snowflake role for this environment connection. |
Warehouse | The default Snowflake warehouse for this environment connection.. |
Database | The default Snowflake database for this environment connection. |
Schema | The default Snowflake schema for this environment connection. |
coming soon!
coming soon!
3. Create your first workflow
By completing the data warehouse step, you’re automatically redirected to a blank canvas to create your first workflow. Workflows consist of triggers and actions, enabling you to seamlessly automate data operations and build CI/CD processes.